Pages

Showing posts with label crochet pattern - free. Show all posts

Saturday, January 26, 2019

Popcorn Stitch Sock Hat for E

Haven't posted in FOREVER.


Finished this hat today.
The pattern is free and can  be made in baby to adult sizes.
Leave a comment with your email and I will send it to you.

Tuesday, April 5, 2016

A Doily for 7 West


10 " (+/-) Diameter
7 West was the floor where my husband spent 3 week after his cancer surgery. They had the nicest nurses, aides and assorted staff members that we have ever met. They made us feel like family.  (I kidded them that Gene was that relative who came for Thanksgiving and never left.)

This doily was designed with them in mind. I hope you enjoy it.


MATERIALS
#10 Cotton Crochet Thread
     Color A - South Maid "Cream"
     Color B - Ant Lydia "Natural"
     Color C - Aunt Lydia
                    "Antique White"

Crochet Hook - B/1-2.25 MM
Scissors
Tapestry/Yarn Needle

Starch, or your preference of something that will stiffen the doily. (I prefer liquid starch.)

Straight Pins
Blocking Board  - Thick/heavy cardboard will work as well


ABBREVIATIONS and STITCHES - US terms
ch - chain
dc - double crochet
hdc - half double crochet
MC - Magic Circle http://furbabiesmomma.blogspot.com/2011/10/how-ro-make-magic-circle.html

Rnd(s) - round(s)
sc - single crochet
sk - kip
sl st(s) - slip stitch(es)
sp(s) - space(s)
tr - treble/triple crochet


PATTERN
Rnd 1: Using Color A and a MC, ch 3, place 1 more dc into the circle, sl st to top of beginning ch 3 to join. (12 dc)

Rnd 2: Sl st to sp between ch 3 and dc, ch 3, dc in same st, 2 dc in next dc and each dc around, sl st to top of Ch 3 to join, Fasten off Color A, join Color B.


Rnd 3: Using Color B, ch 7, *sk 1, sc in next st, ch 7,* repeat from * to * around, sl st into beginning sc to join.

Rnd 4: Sl st to 3rd ch, sc in ch, ch 4, dc in same ch, ch 3, *2 dc in next ch, ch 3,* repeat from * to * around, sl st to beginning sc to join. Fasten off Color B.


Rnd 5: Join Color C, in any ch 1, ch 3, 2 dc in same ch, ch 4,
*2 dc in next ch 1, ch 4,* repeat from * to * around, sl st to beginning ch 3 to join.

Rnd 6: Sl st to 1st dc, ch 4, tr in same st, dc in next st, (dc, 2 hdc, sc, 2 hdc, dc) in ch 4, dc in next st, *3 tr in next st, dc in next st, (dc, 2 hdc, sc, 2 hdc, dc) in ch 4, dc in next st,* repeat from * to * around, tr in st with ch 4 and tr, sl st to ch 4 to join. Fasten off Color C.


Rnd 7: Join Color A in any middle tr, ch 1, sc in same st, ch 2, sc in same st, ch 5, *sc in middle tr, ch 2, sc in same st, ch 5, * repeat from * to * around, sl st to beginning ch 1 to join.

Rnd 8: Sl st to ch, ch 1, *18 sc in ch, ch 2, * repeat from * to * around, sl st in beginning ch 1 to join.


Rnd 9: Sl st to 4th sc, ch 1, sc in same ch, *ch7, sk 7, sc in next st, * repeat from * to *
around, sl st to beginning sc to join.

 Rnd 10: Sl st to 4th ch, ch 1, sc in same ch, ch 7, *sc in next ch, ch 7, * repeat from * to *, sl st to beginning sc to join.


Rnd 11:Sl st to 4th ch, ch 9, sl st in 4th ch from hook, ch 5, *sc in next ch, ch 9, sl st in 4th ch from hook, ch 5, * repeat from * to * around, sl st in beginning sc to join, fasten off, weave in ends.


Finishing: Soak in starch, pin to block and allow to dry.


This pattern has not been tested. 
If you find any errors, please leave me a comment so I can fix it.

Saturday, March 12, 2016

Crocheted During Gene's Time at Roswell Park Cancer Institute

These were my "sanity projects"
 while my husband was in Roswell Park Cancer Institute 
here in Buffalo, NY


Caprice Doily
made from Aunt Lydia's #10 cotton thread
Colors, I believe, antique white and neutral.

Close up of Caprice.
I am planning on giving this to Dr Al-Sukhni.

He had an Adenocarcinoma in his Duodenum.
The doctor told him it is a very rare form of cancer
but very aggressive.
I tell everyone it is so rare
that there is no ribbon color for it :(

Summer Splender
made from Aunt Lydia's #10 cotton thread
Colors, I believe, antique white and neutral.

I am planning on giving this to Dr Kukar
who preformed the surgery
and is my  husbands GI Oncologist

Lucienne' Summer Mandala
Made with Monaco #8 cotton thread.
Lucienne's Summer Mandala
Close Up

Tuesday, November 24, 2015

POINSETTIA TEA LIGHT COZY – free crochet pattern

I saw something with a crochet holder for a tea light. I knew I wanted to make some for Christmas presents, but didn't know what I wanted to make. After playing around all afternoon and evening, this is what I came up with.


I was going to starch the bracts (the red parts mot of us call the flowers when the yellow centers are actually the flower parts) but I thought the softness of the thread added to the look of a flower.


And the BEST PART . . . there is a small opening on the bottom so the light can be turned off and on without removing the candle.

There is a PRINT FRIENDLY button at the bottom of the post for your convenience.

MATERIALS
Color A – Aunt Lydia's Fashion Fashion #3 “Maize”
Color B – Artiste #5 Crochet Thread “Cherry Red”

Crochet Hook – D/3-3.25MM
Tapestry/Yarn Needle

Tea Light – battery operated

NOTES
  1. Beginning ch 2 counts as a sc.
  2. Beginning ch 3 counts as a dc.
  3. Beginning ch 4 counts as a tr.
ABBREVIATIONS
  1. Bl hdc – back loop half double crochet      
  2. ch(s) – chain stitch(es)      
  3. dc cl – double crochet cluster     
  4.  hdc – half double crochet      
  5. hdc2tog -half double two sts together      
  6. MC – Magic Circle/Adjustable Ring - http://furbabiesmomma.blogspot.com/2011/10/how-ro-make-magic-circle.htm      
  7. MM – millimeters        
  8. Rnd(s) – round(s)     
  9.  sc – single crochet      
  10. sl st(s) – slip stitch(es)      
  11. st(s)- stitch(es)      
  12. tog – together      
  13. tr – treble/triple crochet      
  14. yo – yarn over

STITCHES
dc cl – Insert hook in next dc, yo pull up a loop (3 loops on hook), yo, insert hook in next dc, yo pull up a loop (5 loops on hook), yo, insert hook in next dc, yo pull up a loop (7 loops on hook). *Yo, pull through 4 loops,* repeat one more time. Fasten off and weave in ends.

hdc2together – Yo hook, insert hook into given st, pull up a loop, (3 loops on hook). Yo hook, insert hook into next st, pull up a loop (5 loops on hook). Yo hook, pull through all 5 loops on hook.

picot cluster: (ch 4, sl st in beginning ch) repeat one more time, sl st in top of base sc


FLOWER
Rnd 1: Using Color A and a MC, ch 3, place 11 hdc in the circle, sl st to beginning ch 3 to join. (12 hdc)

Rnd 2: Ch 3, hdc in same st, ch 2, sk 2, 2 dc in remaining sts, sl st to beginning ch 3 to join. (23 hdc, 1 ch)

Note: The ch 12and skip will allow you to operate the on/off switch.


Rnd 3:Ch 2, sc in the same st, 2 sc in ch 2, *sc in next st, 2 sc in next st,* repeat from * to * around, sl st to beginning ch 2 to join. (35 sc)


Rnd 4: Ch 3, bl hdc in each st around, sl st to beginning ch 3 to join. (35 bl hdc)


Rnd 5: Ch 3, hdc in same st and next st, hdc2tog, *hdc in next 3 sts, hdc2tog,) repeat around, making last hdc2tog in a t and the base of the beginning ch, sl st to the top of beginning ch 3 to join. (21 hdc, 7 hdc2tog)

Rnd 6: Ch 3, hdc in same st and next st, hdc in next st, pcl, *hdc in next 3 sts, pcl* repeat from * to * around, place a hdc in any remaining sts, sl st to the top of beginning ch 3 to join. Fasten off and weave in ends. (28 hdc, 9 pcl)


BRACT #1 – Turn finished part upside down, attach Color B in the exposed front loop (left from Rnd 4 above) by the seam.

Row 1: Ch 4 (counts as dc, ch 1), dc in same st, (ch 1, dc in next st) repeat 5 more times, dc in next st, ch 3, turn. (9 dc, 8 ch)

Row 2: Dc in same st, ch 3, sk 1, sc in the next ch, (ch 3, sc in next ch,) repeat 2 more times, ch 3, 2 dc in last st, ch 3, turn. (4 sc, 5 chs, 4 dc)

Row 3: Dc in same st, ch 3, sk 1, sc in the next ch, (ch 3, sc in next ch,) repeat 1 more time, ch 3, 2 dc in last st, ch 3, turn. (3 sc, 4 chs, 4 dc)

Row 4: Dc in same st, ch 3, sk 1, sc in the next ch, ch 3, sc in next ch, ch 3, 2 dc in last st, ch 3, turn. (2 sc, 3 chs, 4 dc)

Row 5: Dc in same st, ch 3, sk 1, sc in the next ch, ch 3, 2 dc in last st, ch 4, turn. (1 sc, 2 chs, 4 dc)

Row 6: Tr in same st, ch 2, 2 tr in last st. (4 tr, 1 ch)

Row 7: Dc cl, fasten off, weave in ends.


BRACTS # 2 – 5
  1. Join Color B in next empty front loop.
  2. Repeat pattern for BRACT #1

Per copyright law, do not redistribute (with or without charge) in any form. (Redistributing to others includes by photocopies, scanning, emailing, putting on a CD, posting in Internet forum messages, putting on another web site and any other manner of distribution.) You may sell items made from this pattern.
100% of the price of this pattern supports no-kill pet shelters. The “fur~babies and I THANK YOU for your purchase.

Wednesday, March 18, 2015

Catnip Doves

I haven't made anyting for our local No-Kill Maternity Dog and Cat shelter. I figured it was about time.


The pattern is very simple.


Catnip Doves
Materials and Supplies
#4 Worsted Weight Cotton
   Color A: I Love This Cotton                     “Fiesta”
   Color B: I Love This Cotton                    “Pink”
   Color C: I Love This Cotton                    “Baby Blue”
   Color D: I Love This Cotton                    “White”
  
   Crochet Hook: G/6-4.25MM
   Tapestry/Yarn Needle
   Scissors
   Polyester Fiberfill
   Catnip

Abbreviations and Stitches
 ch = chain
 dc = double crochet
 hdc = half double crochet
 Rnd = round
 sc = single crochet
sk = skip
sl st = slip stitch
sp = space
st(s) = stitch(es)
yo = yarn over
 MC – Magic Circle (http://furbabiesmomma.blogspot.com/2011/10/how-ro-make-magic-circle.html)
Notes
1.    Doves can be made with one 
          color or change colors.
2.   When joining a new color, 
       join it in the last part of the       
       previous st. (example shown is a sc, yo, 
            pull through, and then use the new color to finish 
            the st.)

BODY
Rnd 1: Using a MC, ch 2, make 10 hdc into the circle,
             sl st to beginning ch 2 to join, ch 2.

Rnd 2: 2 hdc in the same st, 2 hdc in each st around, 
             sl st to beginning ch 2 to join, ch 2.

Rnd 3: Hdc in the same st, *2 hdc in the next st,
             hdc in the following st,* repeat from * to * around, 
             sl st to beginning ch 2 to join, ch 2.

Rnd 4: Hdc in the same st and next st, *2 hdc in the next st, 
             hdc in the following 2 sts,* repeat from * to * around, 
             sl st to beginning ch 2 to join, ch 2.

Rnd 5: Hdc in the same st and next 2 sts, 
            *2 hdc in the next st, hdc in the following 3 sts,* 
             repeat from * to * around, sl st to beginning ch 2 to join, 
             fasten off, weave in end.


EDGING with TAIL, HEAD and BEAK
1.      Join yarn at the seam of the body, ch 1, sc in the same st.
2.      Fold circle in half to form body.
3.      Sc front and back together, stopping 10 sts from the end.
4.      NOTE: you may want to place 2 sc in some sts 
                     to keep the shape of the body rounded
5.      Stuff body with Fiberfill and Cat Nip.
6.      Continue scs to the end, ch 2, turn.
TAIL
7.      Place 2 hdc in the same st as the last sc, ch 2, turn.
8.      Place 2 hdc in the same st and 1 hdc in the next st, ch 2, turn.
9.      Dc in 1st st, 2 dc in the next st, ch 1.
10.  Sc down tail and into the base st of the tail, ch 1.
TOP EDGING
11.  Sc between Rnds 4 and 3, ch 1
12.  Sc between Rnds 3 and 2, ch 1.
13.  Sc between Rnds 2 and 1, ch 1.
14.  Sc between Rnds 1 and 2 on the other side of Rnd 1, ch 1.
15.  Sc between Rnds 2 and 3, ch 1.
16.  Sc between Rnds 3 and 4, ch 1.
17.  Sc at the base of Rnd 4.
HEAD
18.  Place at between 9 and 11 dc in the same st as the last sc,
         sl st to edging, ch 2, turn.
BEAK and FINISHING HEAD
19.  Sc in 1st st, ch 3, sl st in sc. (UPDATE . . . 31 March 2015)
20.  Sc in remaining sts on the head, sl st to the back edging, 
       fasten off, weave in end.

Thursday, February 5, 2015

Dru's Crochet Towel Topper

I made these a week or so ago and have had several people ask for the pattern.

This pattern is more of a guide than an exact pattern. You may print it using the PRINT FRIENDLY button at the end of the pattern.

I will try my best to explain what I did and, if you have any questions, my contact info is at the top of the page.

~*~*~*~*~*~*~*~*~*~*~

MATERIALS NEEDED
Cotton Yarn (ie Peaches & Cream, Sugar n' Cream, Hobby Lobby 'I Love This Cotton")
Two 1" in Diameter Buttons 
Crochet hook: G/6-4.25MM 
Tapestry/Yarn Needle
Scissors

You have two options with your kitchen towel.

OPTION #1(shown)

  1. Cut towels in half. (I use the fold line of the towel.)
  2. Fold about 1/4" over on the cut side.
  3. Using a piece of yarn 36" long, blanket st along the top (cut side) over the part that had been folded over. This is my favorite link for help on doing the button stitch.
  4. Now you have your yarn base for your pattern.


OPTION #2
1. Fold towel in half using the fold of the towel as your fold.
2. Using a piece of yarn 36" long, blanket st along  the fold. (Going through two thicknesses is more difficult than option #1.)  This is my favorite link for help on doing the button stitch.
3. Now you have your yarn base for your pattern.

STITCHES USED
BST: blanket stitch
ch(s): chain(s)
dc: double crochet
RS: right side
sc: single crochet
sc2tog: sc ch and sc together
shell: 5 dc in given st
sk: skip
sp(s): space(s)
st(s): stitch(es)


BEGINNING PATTERN
Row 1: With RS of towel facing, join the yarn on the far right side, ch 1, sc in the BST and each BST across (some blanket stitches may need 2 sts to fill them in), ch 1, turn.

Row 2: Sc in same st, *ch 1, sk 1, sc in next st,* repeat from * to * across, ch 1, turn.

Row 3: Sc in same st and next st, *ch 1, sk 1, sc in next st,* repeat from * to * across, make sure you sc in the last st, ch 1, turn.

Row 4: Repeat Row 3.

Row 5: Repeat Row 3 EXCEPT, stop 6: from the end, fold the end of the towel over the WS (make sure there is a sc at at the fold, you may need to adapt your fold), sc in the next st and the last st of Row 4 together, *ch 1, sk 1, sc in next st,* repeat to the end of the row making sure you join the front and the back together, ch 1, turn.

Row 6: Repeat Row 5.

DECREASE PATTERN
Row 1: Sc in same st and next st,*ch 1, sk 1, sc in next st,* repeat from * to * across sc 2 together, ch 1, turn.

Row 2: Sc in same st, *ch 1, sk 1, sc in next st,* repeat from * to * across sc 2 together, ch 1, turn.


Rows 3 -9: Repeat Row 2.

Rows 10-16: Repeat Row 3 of Beginning Pattern

Now is the time to check to see if your topper fits comfortably over your stove handle.

  1. If too short, Repeat Row 3 of Beginning Pattern until you reach the length you want.
  2. If too long, remove the rows you do not need. 


BUTTON HOLE ROW
Sc in the same st and the next 3 sts,  (sc and ch sps), ch 4, sk 4, sc in each st and ch sp across until there are 7 sts left, ch 4, sk 4, sc in remaining sts and chs, ch 1, turn. 

Next Row: Sc in each st across, ch 1, turn.

Last Row before Edging: Repeat Row 3 of Beginning Pattern


EDGING : due to the number of sts you have in the last row, you may need to sc in 2 sts between some or all of the shells
Sc in same st, *sk next ch, shell in next ch, sk 1 ch, sc in next ch,* repeat from * to * across, fasten off and weave in end.

Finish by adding your buttons to the topper.

REMEMBER, if you need any help, my contact information is at the top of this page.

Monday, October 6, 2014

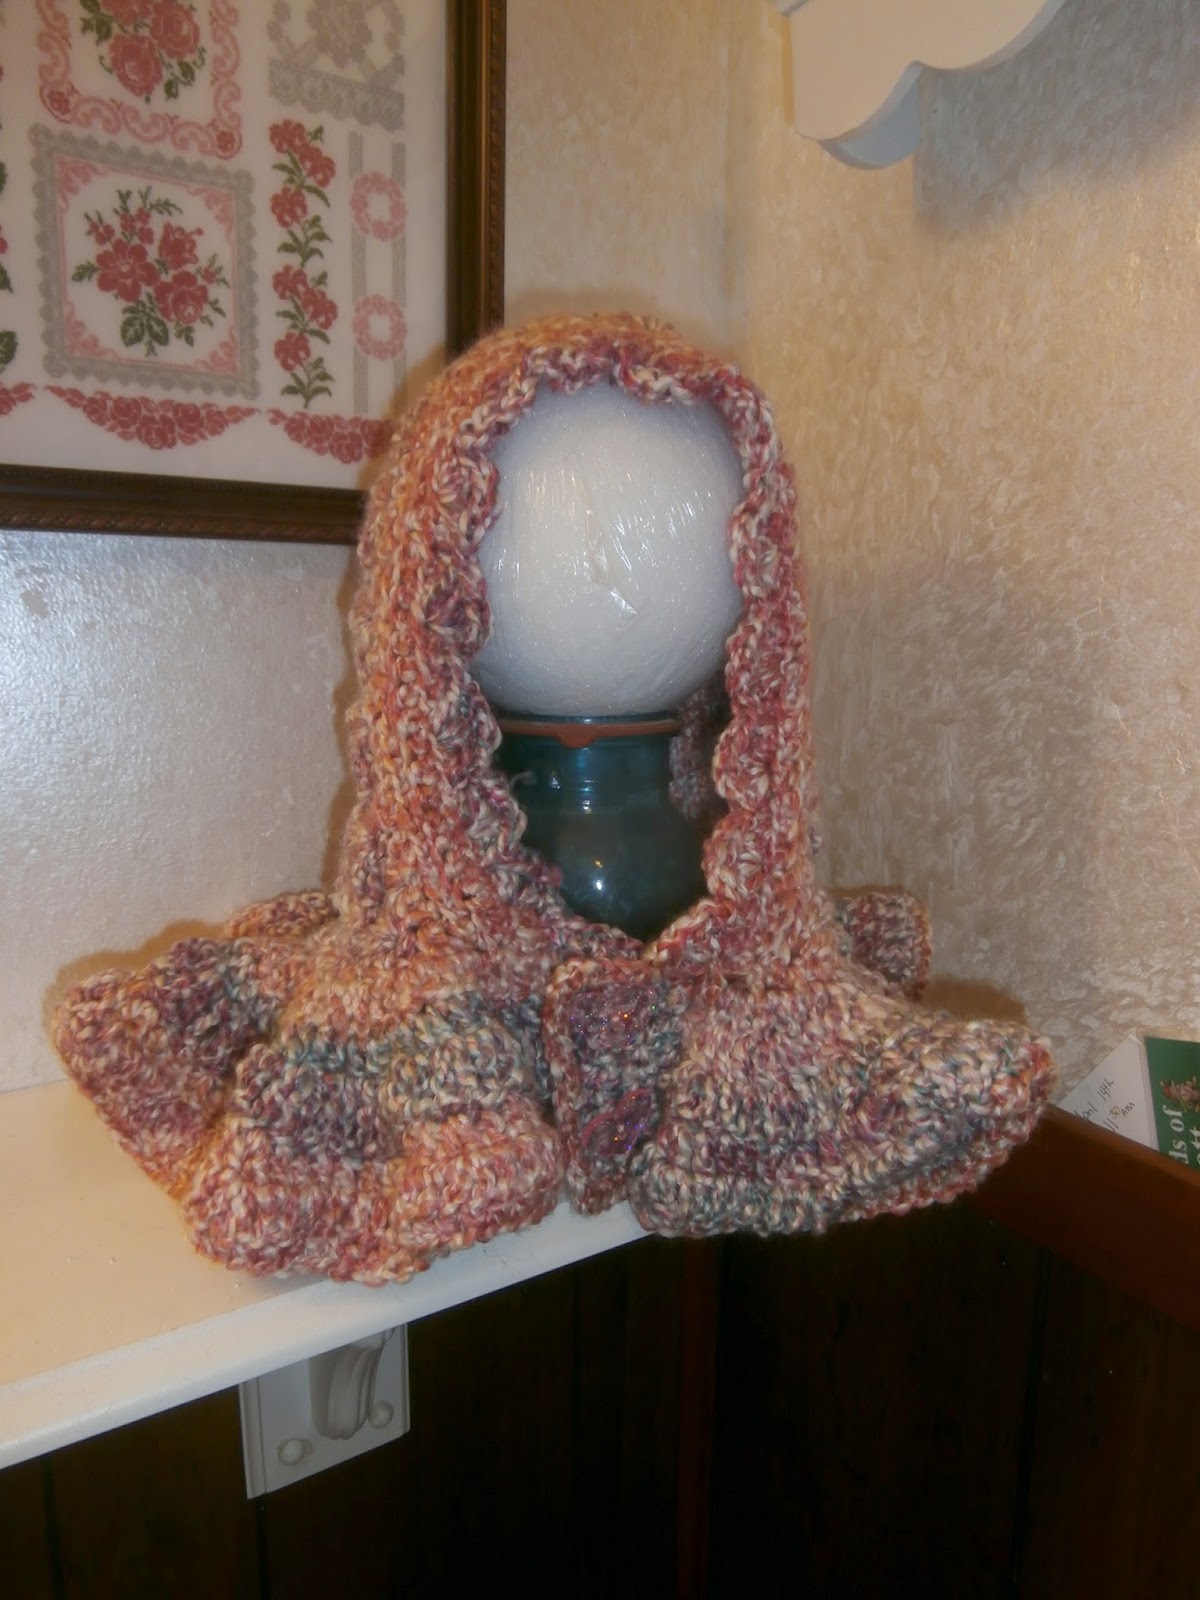
Medieval-ish Hood with Ruffle

Not sure is Medieval-sh as an acceptable word
but, then again, where do sportscaster get off using "physicality?"
However, when I saw the picture of this
I immediately thought
of the headpiece a knight
wears under his armor.


This is a winter hat 
made using Lion Brand Homespun
in the color "Mimosa."


You can barely see the buttons.
I fund them at JoAnne's today.
 wanted something that would blend in . . . 
looks like I accomplished it.
They are actually a clear,
iridescent pint hearts.


This pattern is available in my Ravelry Store for FREE
Just click on the link below.


All proceeds from this pattern will be donated 
to a no-kill animal shelter in Western New York 
or one my home state of Indiana. 
The Fur~Babies and I thank you for your purchase

Sunday, January 26, 2014

Braided Cowl Pattern

I just LOVE this cowl. The only thing I will do differently next time is ch 300 at the beginning so I will be able to wrap the cowl around my neck 3 times


Materials
Worsted Weight Yarn - 3 complimentary colors
Crochet Hook = K
Scissors
Yarn/Tapestry Needle

Stitches
ch = chain
dc - double crochet


Pattern
Row 1: Ch 200, dc in 3rd ch form hook and each chain to the beginning, ch 2, turn.

Rows 2 - 4: Dc in each st across, ch 2, turn.

Row 5: Dc in each st across, fasten off and weave in ends.

Repeat Rows 1 - 5 with two complimentary colors.

Finishing:

  1. Braid three strips together. 
  2. Join matching ends when braiding is complete. 
  3. Slip stitch or whip stitch matching ends together.

Monday, December 9, 2013

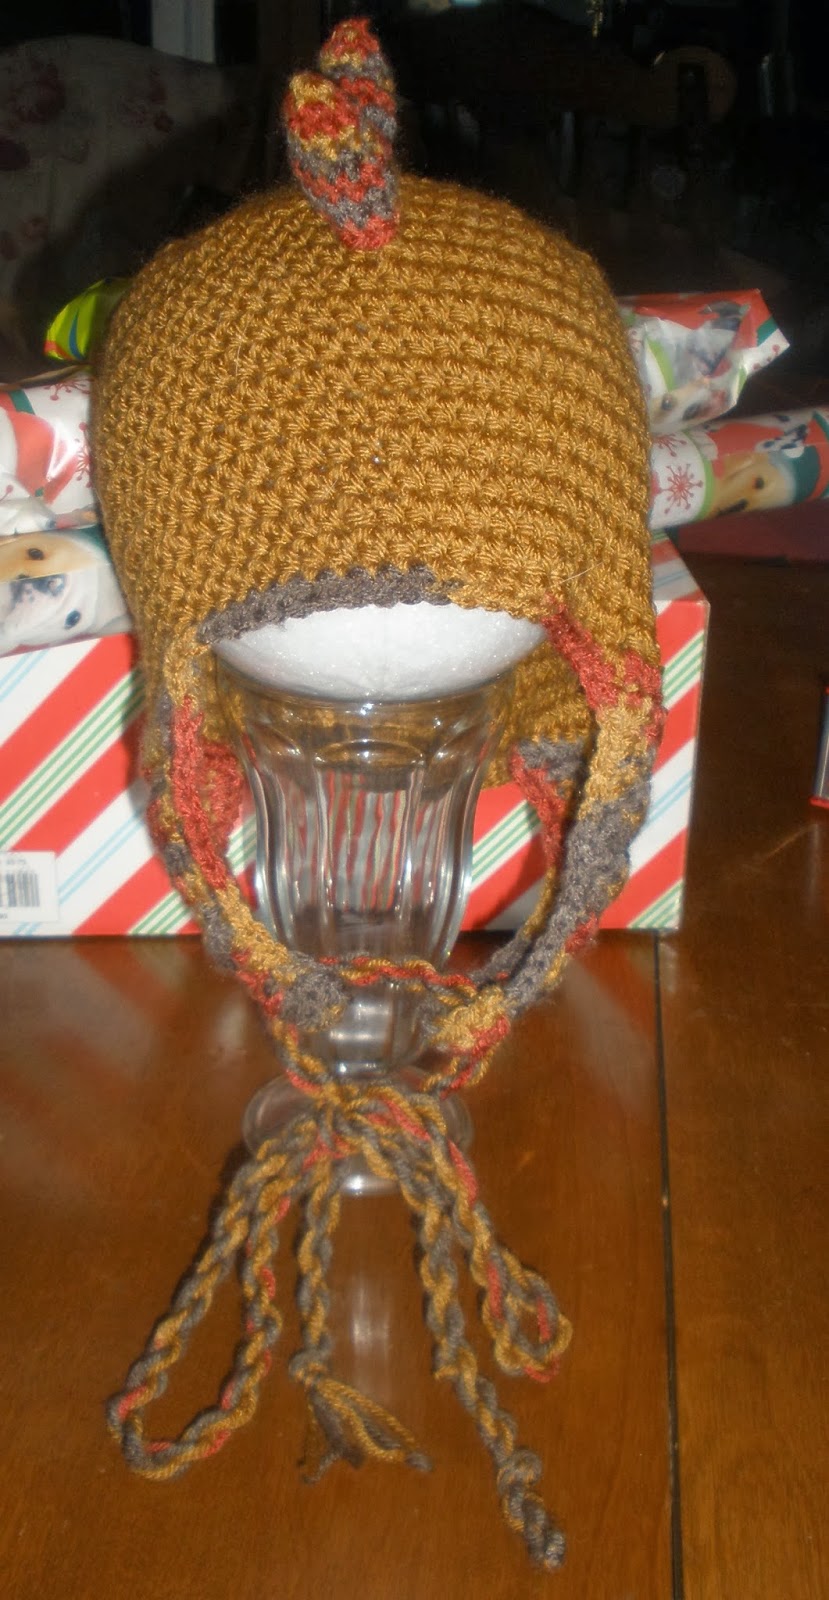
Stegosaurus Hat . . . Version II

This is SO MUCH Cuter than the last stegosaurus hat I made.

Here is the picture from Christmas,
I do believe it was his year for dinosaurs, which he loves.
Besides the hat, he got
a "collection" of dinos and the CUTEST dino train . . .
three dinos, that hook together . . .
the one in front has a battery so that, when turned on,
it pulls the other two around a rilroad-type track.

I just LOVE the ties.
It is SO HARD to find cute ties for a boys hat
and these ties are C*U*T*E ! ! ! ! !


If you would like this pattern it is FREE in my Ravelry Shop,
just click above.