Pages

Showing posts with label hat - can be made for any size head. Show all posts

Saturday, May 25, 2013

A Very Hungry Caterpillar and His Hat

This pattern is a Two-4-One. One pattern is for the Caterpillar Toy and the other pattern is the Caterpillar Hat.


I made the Caterpillar Toy for my neighbor boy’s 3rd Birthday and gave it to him with a copy of The Very Hungry Caterpillar book. The hat wasn’t quite done yet, but he didn’t know . . he was enthralled with his toys, and the poor caterpillar and book were pushed aside … OPEN IT NEXT became the joke of the day … unless it was a toy he knew, he was on to the next package, just like all kids.
A couple of days later when I took the hat over, he was napping. Later on that day his mother sent me the picture of him in the hat holding his caterpillar toy.

The patterns are both written so the sizes are adaptable … you may add or delete “body balls” to make a caterpillar the size you desire. Personally, I like them long … maybe as long as the child, if the child is a baby.


Their is a chart to show the normal sizes of heads from preemie to adult men. So you will refer to that chart (if you don’t have the head you need to fit available) to make your patter.
I ended up making two Caterpillar Toys (both about the same length) from the 1 skein of each color. The Caterpillar Hat took less than a skein of the colors used.
I just LOVE the fuzzies on the back of his body.

I had two buttons that would fit together to make a 2 dimensional eye so I used them on two of the three caterpillars I made. On the last one, I used safety eyes, Honestly, I like the buttons better … they add depth to the face.

Now isn't that the cutest caterpillar face you have ever seen?

~*~*~*~*~*~*~*~*~*~
If you would like to buy the pattern, it is available for $ 4.99 in my Ravelry Store, "The Fur~Babies Momma." Just click the buy now button to be transported to my shop.
   
 ***100% of the purchase price for the pattern goes to no-kill animal shelters in Western New York  and in my home state of Indiana.***

Friday, December 30, 2011

Polar Bear Hat


Or, is it a white Piggy Hat . . . I'm not sure.

It started out as a fluffy polar bear and now, I think it is a fluffy white piggy . . . who looks sort of lost. LOLOL

I made it for my niece Mady for Christmas this year.

Might have to make it in Pink for her brother, Jackson, for next year. I think he could pull off a pink piggy hat! I'll just leave off the eyelash yarn. I want him to look as masculine as possible in a pink piggy hat!  LOLOL


Remember, 100% of the purchase price for the pattern goes to
a no-kill dog shelter in my home state of Indiana.
It is a 501(c) 3 non-profit organization.


Wednesday, December 22, 2010

Sock Monkey Hat Pattern


MATERIALS USED
Worsted Weight Yard
Crochet Hook - G/6-4.25MM
     Color A: Red Heart Super Saver - Buff
Tapestry/Yarn Needle
     Color B: Red Heart Super Saver - Aran
Scissors
     Color C: Red Heart Super Saver - Red


GAUGE: Not Important, this pattern uses the size chat at the end of the pattern to achieve the size hat you desire.


ABBREVIATIONS & STITCHES
blo = back loop only

sc = single crochet
ch = chain

st(s) = stitch(es)
RS = right side

WS = wrong side

NOTES FOR HAT
1.      This hat can be made for any size from a preemie to an adult male. 
      You will need to make your crown the circumference and height 
      of the person you are making the hat for.
2.      Check the chart at the bottom of the pattern for the circumferences
      and heights for different ages of individuals. Then, fill in the
      information you need below.
a.       _____ Circumference of Head
b.      _____ Circumference For Hat
c.       _____ Height of Hat
3.      To make measuring the hat easier:
a.      cut a piece of yarn in one color the length of the 
      circumference of the hat.
b.      Cut another piece of yarn, in a different color, the 
      length of the height you need.
4.      Do not fasten off. Carry un-used color until the next use.
5.      HINT: To get a GREAT size match, use Styrofoam balls with the 
                 circumference of the head you want to fit. This works 
                 SO MUCH BETTER than measuring in inches.

SET UP FOR HAT
Row 1 (RS): Make a chain equal to, or close to, the height 
                    needed, sc in 2nd ch from hook and in each 
                    ch to the end, ch 1, turn.

Row 2 (WS): Sc in blo of each st but stop 5 sts before the 
                     end, ch 1, turn.

Row 3: Sc in blo of each st to the end, ch 1, turn.

Row 4: Sc in blo of each st to the end of row 2, then sc
            in the remaining sts remaining on Row 1, ch 1, turn.

PATTERN for REMAINDER OF HAT
Row 5: Sc in blo of each st to the end, ch 1, turn.

Row 6: Sc in blo of each st but stop 5 sts before the end, 
           ch 1, turn.

Row 7: Sc in blo of each st to the end, ch 1, turn.

Row 8: Sc in blo of each st to the end of row 2, then sc in 
           the remaining sts on Row 1, ch 1, turn.

REPEAT Rows 5 - Row 8 until your hat reaches the 
          circumference needed.


BRIMS - With RS facing and bottom edge upward, 
               attach yarn A to the top of the row furthest 
               to the right (remember, this is the actual 
               bottom of the hat.)

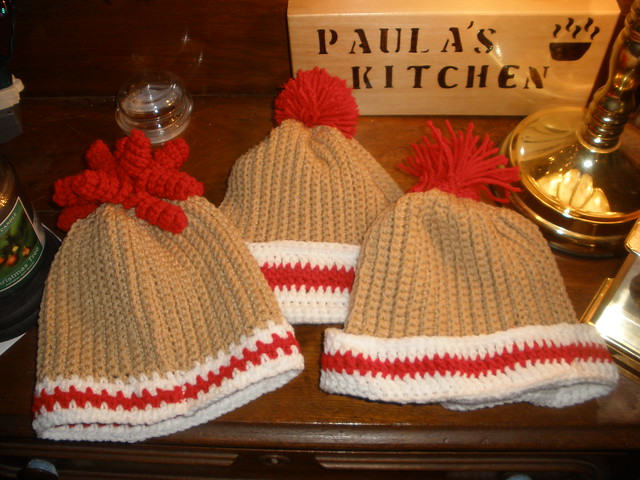
ADULT (in the middle of the picture)  and BABY (on the right 
             in the picture.) 
Row 1: Ch 1, sc in same st, *ch 1, sk 1, sc in next row,* repeat from 
             * to * across, ch 1, turn.

Row 2:  Sc in same st, sc in next sp, *ch 1, sk 1, sc in next row,* 
              repeat from * to * across, ch 1, turn.

Row 3: Sc in each sc and sp across, ch 1, turn.

Row 4:  Sc in each st across, ch 1, turn.

Row 5: Sc in same st and in the BL of each sc across, ch 1, turn.

Rows 6-7: Repeat Rows 1-2.

Rows 8-9: Join Yarn C and repeat Rows 1-2, fasten off.

Rows 10-11: Rejoin yarn A and repeat Rows 1-2. fasten off.


GIRLS (shown on the left in the photo.)
Row 1: Ch 1, sc in same st, *ch 1, sk 1, sc in next row,* repeat 
             from * to * across, ch 1, turn.

Row 2:  Sc in same st, sc in next sp, *ch 1, sk 1, sc in next row,* 
              repeat from * to * across, ch 1, turn.

Rows 3-4: Join Yarn C and repeat Rows 1-2, fasten off.

Rows 5-6: Rejoin yarn A and repeat Rows 1-2. fasten off.


TOP DECORATION: using yarn C
ADULT (in the middle of the picture) 
Add a pom-pom after joining sides and gathering top.

BABY (on the right in the picture.) 
1.      Cut one 5 inch piece of yarn for every other row, fold in half.
2.      Pull yarn through every other row as if you were making fringe.

GIRLS Banana Curls (shown on the left in the photo.)
With RS facing and top edge upward, attach yarn C to the 
top of the row furthest to the right.
1.       Ch 16, 3 sc in 3rd ch from hook.
2.      Make 3 sc in each ch to base.
3.      Sl st into the same row, sc in the end of the next row.
4.      Sc in the next row,
5.      Repeat Steps 1 - 4 until you have finished with the last row.

LOOPIES (not shown)
Baby - Ch 30, twist the ch as tightly as possible then to next Row of pattern.
Toddler - Ch 40, twist the ch as tightly as possible then to next Row of pattern.
Child - Ch 50, twist the ch as tightly as possible then to next Row of pattern.
Adult - Ch 60, twist the ch as tightly as possible then continue to next Row of pattern..

FINISHING
With wrong sides together, sc beginning and end rows together,
 fasten off and weave in end on wrong side.


Sock Monkey Sock Hat
MEASUREMENTS FOR HATS

Head Circumference
Circumference of Hat
Diameter of Hat
Height of Hat
Preemies


1-2 pounds
9”  – 10”
7 ½”   – 8”
2 ½”
3 ½”  – 4”
2 – 3 pounds
10” – 11 ¼”
8 ½”  – 10”
2 ½” - 3”
4”
4-5 pounds
11 ½” - 12 ½”
9” – 11 ½”
3” - 3 ½”
4” – 4 ½
5 ½ - 6 pounds
12 ½” – 13”
11” – 12”
3 ½”  - 3 ¾”
5” – 5 ½


Newborns
13” – 14”
11” – 13”
3 ¾” - 4”
5” – 5 ½
3 – 6 months
14” – 17”
12” – 15”
4” - 4 ¾”
6 ½” - 7
6 – 12 months
16” – 19”
14” – 18”
4 ¾” - 5 ¾”
7 ½”
12 months  – 3 years
18” – 20”
16” – 19”
5 ¾” - 6”
8”


3 – 10 years
19” – 20 ½”
17”– 19 ½ ”
6”  – 6 ¼”
8 ½”


Pre-teens and teens
20 ½” – 22”
18 ½ ” – 21”
6¼” – 6 ¾”
9” –10”
Adult Women
21 ½” - 22 ½”
19 ½ ” – 21 ½ ”
6 ¾” – 7”
11”
Adult Men
23” – 24”
22” – 23”
7” – 7 ¼”
11” – 11 ½”


Tuesday, December 21, 2010


I had made sock monkey dolls for my great niece and the 8 month old (he is , probably, close to 9 months old now) across the street. I wanted something else for them for Christmas. That’s when I came up with this pattern. I wanted something to go with the sock monkey dolls but not look like the sock monkey hats I had seen.

I made the baby (boy) hat 1st. Somehow, I made a MAJOR counting error and it ended up adult size. Don’t ask me how, I have no idea why I didn’t catch what I was doing …. but I liked the outcome. (Shown in the middle of the top photo and by itself in the bottom photo.)

 When I made the one for Aiden, I didn’t want a pom-pom since his sock monkey doll didn’t have one on his hat . . so I went with a simple fringe at the top. (Shown on the right in the top photo.)

Iwanted Mady’s to be a little “girlie” so I added ringlets to the top instead of a pom-pom. (Shown on the left in the top photo.)

This is a close-up of the adult hat.
 I'll get the pattern posted in my Fur~Babies Momma blog when I write it down. It is the same basic pattern I have used on my other "sock" hats but the girl's "brim" is different than normal.

Sock Monkey Sock Hats


I had made sock monkey dolls for my great niece and the 8 month old (he is , probably, close to 9 months old now) across the street. I wanted something else for them for Christmas. That’s when I came up with this pattern. I wanted something to go with the sock monkey dolls but not look like the sock monkey hats I had seen.

I made the baby (boy) hat 1st. Somehow, I made a MAJOR counting error and it ended up adult size. Don’t ask me how, I have no idea why I didn’t catch what I was doing …. but I liked the outcome. (Shown in the middle of the top photo and by itself in the bottom photo.)

 When I made the one for Aiden, I didn’t want a pom-pom since his sock monkey doll didn’t have one on his hat . . so I went with a simple fringe at the top. (Shown on the right in the top photo.)
I
wanted Mady’s to be a little “girlie” so I added ringlets to the top instead of a pom-pom. (Shown on the left in the top photo.)


This is a close-up of the adult hat.
 I'll get the pattern posted when I write it down. It is the same basic pattern I have used on my other "sock" hats but the girl's "brim" is different than normal.

Monday, November 15, 2010

Creamsicle Dress and Hat

This pattern was originally published 
June 21, 2009.


I came up with a new pattern. I am IN LOVE with the combination of orange and yellow. It reminds me of the creamsicles we ate as youngsters. (The ones today don't have that same, refreshing taste that I remember.)

As I was crocheting, I was writing out the pattern. Now, all I have to do is decipher my chicken scratches and get the pattern committed to paper. To me, this is 500 times harder than actually making the item. I have even tried to have Gene write it as I tell him what to write, but that wasn't working to good either. Maybe I need to go back to the "old Dictaphone" and see if I can do it any better that way. (I am having visions of sitting down with the earphones in looking like a frazzled Mrs. Wiggins form the Carol Burnett Show!) But, with my luck, I would keep changing the directions but when I typed them out, I would forget, type the original and then have to go back, delete and re-write. Not A Whole Lot Of Fun ! ! !

Hopefully, I will have the pattern written out by the 1st of July so you can still make it for summer enjoyment.  And, if you wonder what design is on the ribbons, they are cupcakes.


    Aunt Lydia's Fashion Crochet (Size 3) 

This pattern is available, for $1.00,  through my Ravelry Store,
  3.25 mm (D) / 3.5 mm (E)
  12 - 18 mo, 2 & 3 years
The Fur~Babies Momma.
Just follow the magic buttons below.
     add to cart     show cart


Remember, 100% of the purchase price for the pattern goes to
Natalie's 2nd Chance Shelter,
a no-kill dog shelter in my home state of Indiana.
It is a 501(c) 3 non-profit organization.


Signed~
I Never Claimed to Be a Writer!
(774)

Molly's Hat

This pattern was originally published October 10, 2008


Molly's hat is a pattern that I designed to go with a sweater that I had made. I needed something that would incorporate a color called "seashore" with white. This made me be creative.
I am still working on the pattern. I should have it posted before the end of October.


I will try to include a photo of the whole ensemble. You will see how I paired with "Molly" to make her afghan and booties a complete ensemble. I made a sweater and hat to go with them.

The ensemble will be sent to Pine Ridge Indian Reservation to be given to a newborn baby at the Indian Health Services OB Ward.
MOLLY'S HATCrochet Hook - G

Yarn: Any type or weight form Baby Yarn on up to Bulky.

Hook: appropriate hook for yarn weight

Yarn Needle

The width and heath of this pattern depends on the size you are making. Therefore, refer to this chart at Bev’s Country Cottage to find the measurements you need.

Make a chain 3 links longer than you need for the length.

Row 1: sc in third ch from the end, sc in each stitch to the end of the row. Ch 1, turn.

Row 2: sc in back loop of each stitch to the end.

Row 3: sc in back loop of each stitch to the end. Now chain the number of links you need for the loopy. (I normally chain 25 – 30 since I like mine long and sloppy.) [see photo below]

Row 4: sc in back loop of the last stitch on Row 3. Continue until the end of the row. Ch 1, turn.

Row 5 & 6: Repeat Row 2 twice.

Row 7 & 8: Repeat rows 2 & 3.

You should now have the following: [see photo below]
Chain & Row 1 : No loopy at end
Rows 2 & 3: Loopy at the end
Rows 5 & 6: No Loopy
Rows 7 & 8: Loopy at the end

Repeat Rows 5, 6, 7 & 8 until you have reached the width you want.

Finishing:
1. Join the sides so that you will end up with your yarn at the Loopy side of the hat.
2. Cut the yarn at a length of 12 “ (or more if you feel you need it for step 3.)
3. Thread yarn into a yarn needle and weave through the hat at the bottom of each loopy.
4. If you don’t like this technique, just weave your hook through the hat at the bottom of each loopy. (Make sure your hook end is at the start of the loopies.)
5. Pull yarn as tight as you can. Finish off.

If the opening at the top of the hat does not completely close,
Thread another yarn needle with more yarn and on the underside of the hat at the top, sew the opening together.

Variations:
Two colored Loopies1. Before weaving yarn through to close the top, join different colored yarn at the end of the first row without a loopy.
2. Ch 25 (or whatever you chained) sc to base of loopy.
3. Sc at the end of next set of empty rows.
4. Repeat steps 2 & 3 until you reach the end.
5. Follow steps 1 – 5 in Finishing directions.

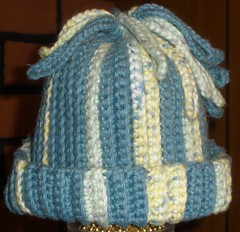
Various height Loopies
Make every other loopy a different length. Ch 20 and ch 30 are what I usually use.

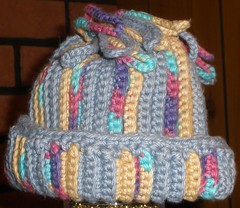
Two colored Loopies of various heightsMake your second color loopies a smaller chain.

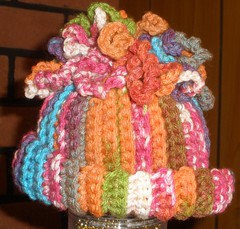
To get the "loopies" that look core like curls, before you attach the last chain of the loopy to the hat, twist the loopy . . the more twist, the tighter the curl.

Please let me know if you discover an error.
If you decide to copy this pattern, all I ask is that you leave a comment for me and then send a copy of your finished  project so that I may post the different looks that have been created.

http://thefurbabiesmomma.blogspot.com/ ©2008 Paula Gaumer Tooke thefurbabiesmomma@gmail.com
Reproducing or transmitting this pattern by any means for any purpose other than personal or charity use constitutes a violation of copyright law. Direct linking to a pattern or recipe is allowed.


Crocheting hands are not snacking hands~
(318)


And, an adult version.